If you see an error like “This app package’s publisher certificate could not be verified” on Windows 11, don’t worry. There is an easy approach to install a root certificate with a validated signature. This solution is applicable to both the MSIX and MSIXBUNDLE packages. Here’s how you do it.

First step (Step 1) #
The first step is to install the root certificate to your local machine (the root certificate is located inside the main HSL Station folder called; “HSLOnline.StationUi_1.0.16.0_x86.cer”)
Installing certificate on macOS Monterey Keychain via CLI #
sudo security add-trusted-cert -d -r trustRoot -k "/Library/Keychains/System.keychain" myCA.pem (replace myCA.pem with your certificate)Via the macOS Keychain App #
- Open the macOS Keychain app
- If required, make sure you’ve selected the System Keychain (older macOS versions default to this keychain)
- Go to File > Import Items…
- Select your private key file (i.e.
myCA.pem) - Search for whatever you answered as the “Common Name” name above

- Double-click on your root certificate in the list
- Expand the Trust section
- Change the “When using this certificate:” select box to Always Trust
- Close the certificate window
- During the process it may ask you to enter your password (or scan your finger), do that
Adding the Root Certificate to Windows 10 #
- Open the “Microsoft Management Console” by using the Windows + R keyboard combination, typing
mmcand clicking Open - Go to File > Add/Remove Snap-in
- Click Certificates and Add
- Select Computer Account and click Next
- Select Local Computer then click Finish
- Click OK to go back to the MMC window
- Double-click Certificates (local computer) to expand the view
- Select Trusted Root Certification Authorities, right-click on Certificates in the middle column under “Object Type” and select All Tasks then Import
- Click Next then Browse. Change the certificate extension dropdown next to the filename field to All Files (*.*) and locate the
myCA.pemfile, click Open, then Next - Select Place all certificates in the following store. “Trusted Root Certification Authorities store” is the default. Click Next then click Finish to complete the wizard.
If everything went according to plan, you should see your CA certificate listed under Trusted Root Certification Authorities > Certificates.

Second step (Step 2) #
Override the “Publisher Certificate Could Not Be Verified” #
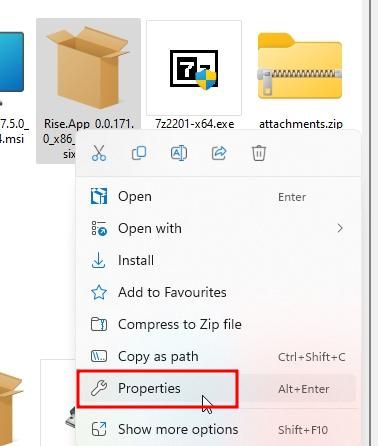
- To begin with, right-click on the MSIX/MSIXBUNDLE package and click on “Properties” in the context menu.
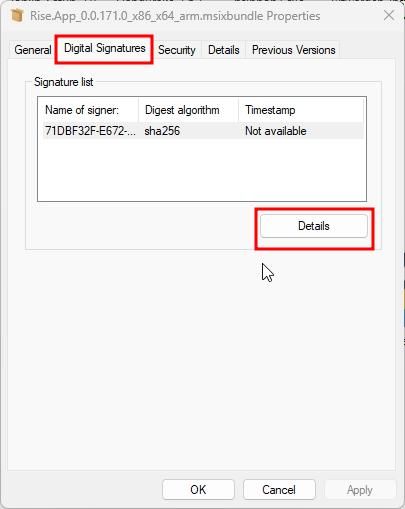
2. Next, a Properties window will open up. Here, move to the “Digital Signatures” tab and click on “Details”.
Note: If “Digital Signatures” does not appear here, move to the next section for a working solution.
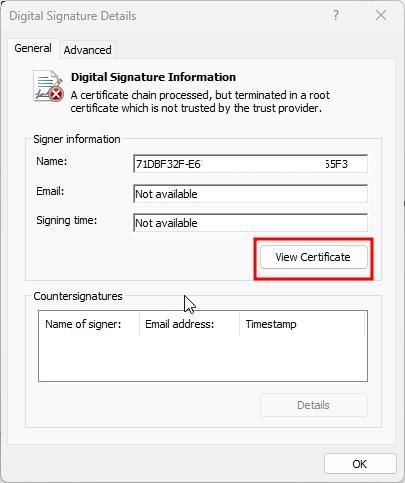
3. After that, click on “View Certificate“.
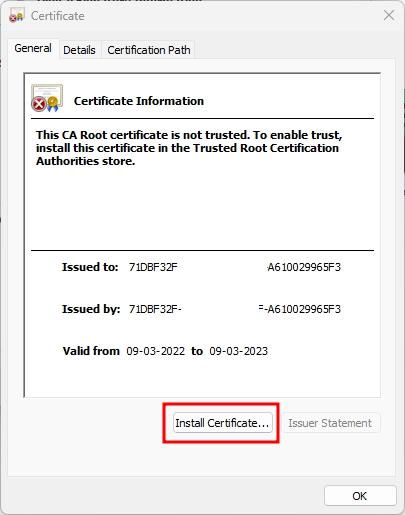
4. Next, click on “Install Certificate“.
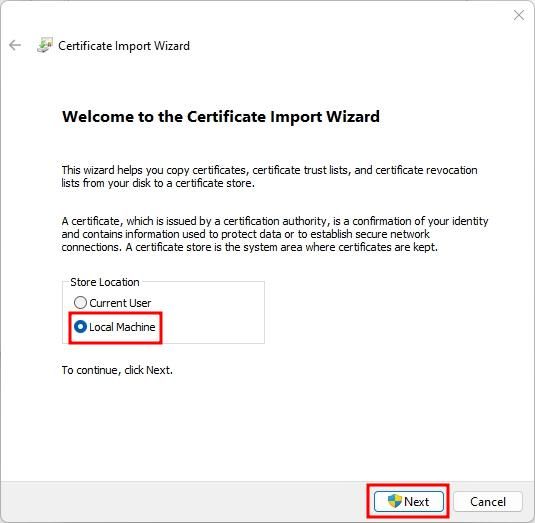
5. A new Certificate Import Wizard will open up. Here, select “Local Machine” and click on “Next”.
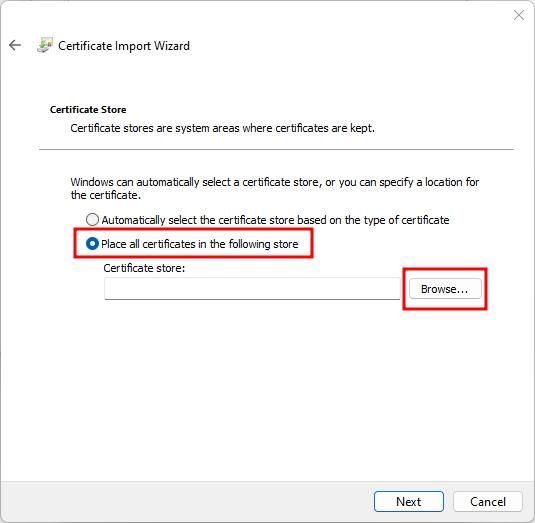
6. After that, choose “Place all certificates in the following store” and then click on “Browse”.
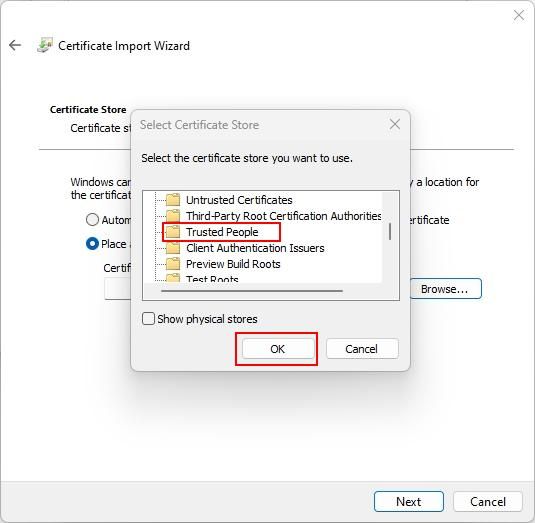
7. In the tiny pop-up window, scroll down and choose “Trusted People” and click on “OK”.
8. Finally, click on “Next” and “Finish” to import the certificate.
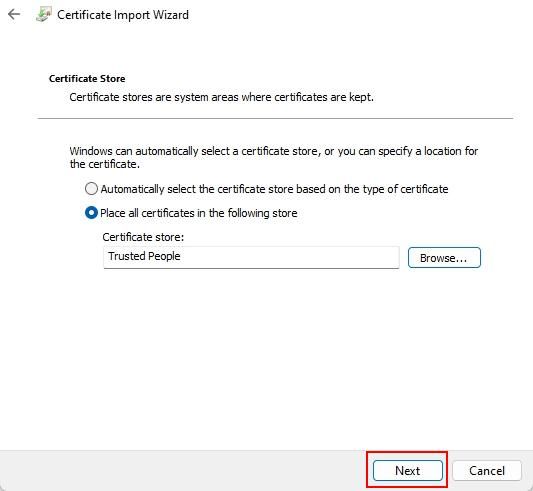
9. As you can see here, the signed certificate has been installed. You can now close all the open windows.
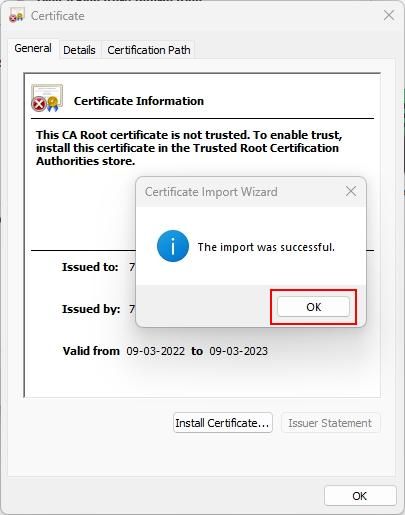
10. Finally, go ahead and double-click on the MSIX/MSIXBUNDLE package, and it will allow you to install the app without any errors.